HWID Spoofer Setup Guide: Step-by-Step Preparation
What to do before you run an HWID spoofer: clean Windows install, BIOS version, TPM and Secure Boot settings and final checks, with screenshots.
Updated: · 4 min read
This guide covers the preparation you need before you run the spoofer. Follow the steps in order and do not skip any. The guide is written for a Windows 10 install. If you are unsure about a step, stop and write to support.
Important: BIOS changes affect your computer. Do each step together with your motherboard maker's instructions and make sure the computer will not lose power during the process. Back up your important files first, because every disk will be wiped.
1. Install Windows without internet
Unplug the ethernet cable before you start installing Windows. The computer should stay offline until the installation and the following steps are finished. If you use Wi-Fi, do not connect during setup.
2. Delete every partition, do not format
When setup asks "Where do you want to install Windows?", select each partition one by one and press Delete. Do not use the "Format" option. According to the guide, formatting without deleting the partitions stops the spoofer from working.
After deleting, only "Unallocated space" is left. Select it and press Next.
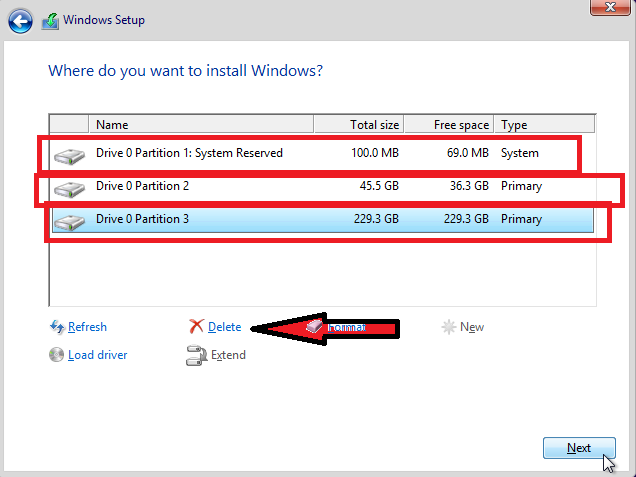
Use the original Windows image downloaded from Microsoft's own site.
3. Pause Windows updates
After Windows is installed, go to Settings > Update & Security > Windows Update and pause updates. This screen has a "Pause updates for 7 days" option.
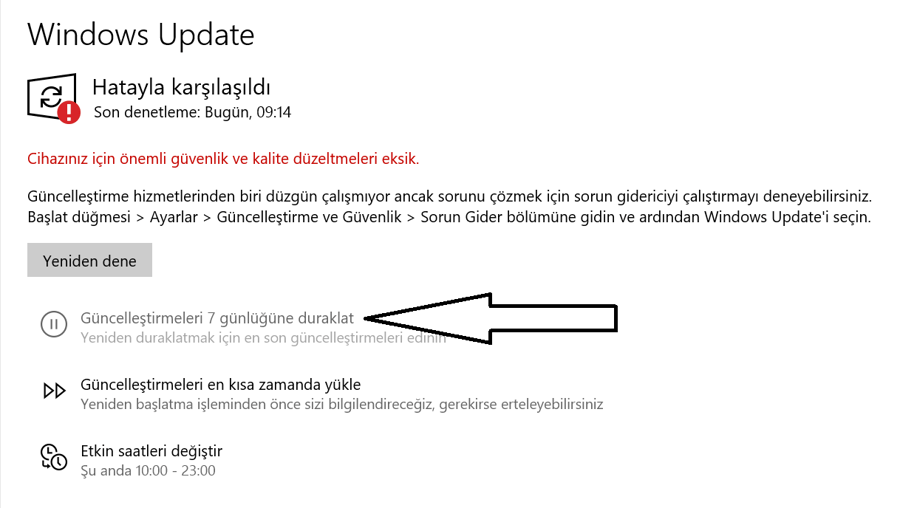
4. Change the BIOS version
In this step the BIOS needs to move to a different version. What matters is that the version differs from the one installed now.
- Find your motherboard model and open the support page on the maker's official site.
- Download the BIOS files for that exact model.
- Enter the BIOS settings and change the version with the method the maker describes.
- If you cannot find a newer version, move to an older one. What matters is that it is a different version.
The update method differs by maker (MSI, ASUS, Gigabyte, ASRock and others). Follow the maker's official instructions. Do not turn the computer off while it updates, or the board can be damaged. A wrong BIOS file carries the same risk, so check the model name exactly.
5. Turn off TPM
Enter the BIOS, find the Security tab and disable TPM. The option name varies by maker (for example PTT, fTPM or Security Device Support).
6. Turn off Secure Boot
Go to the BIOS Boot menu and turn Secure Boot off. Save the settings and exit the BIOS.
7. Turn off Windows Defender
Click Start, type "Windows Security" and open the app. Go to Virus & threat protection > Manage settings and set Real-time protection to Off.
If turning it off is not enough, write to support and say which step you are stuck on. Also ask support whether protection should be turned back on afterwards. Only run files from the site you bought from and from sources support points you to.
8. Do the final checks
Before you finish, confirm two things.
- In Windows, search for msinfo32 and press Enter. Check that Secure Boot State shows Off.
- Search for tpm.msc and press Enter. The screen should show "Compatible TPM cannot be found".
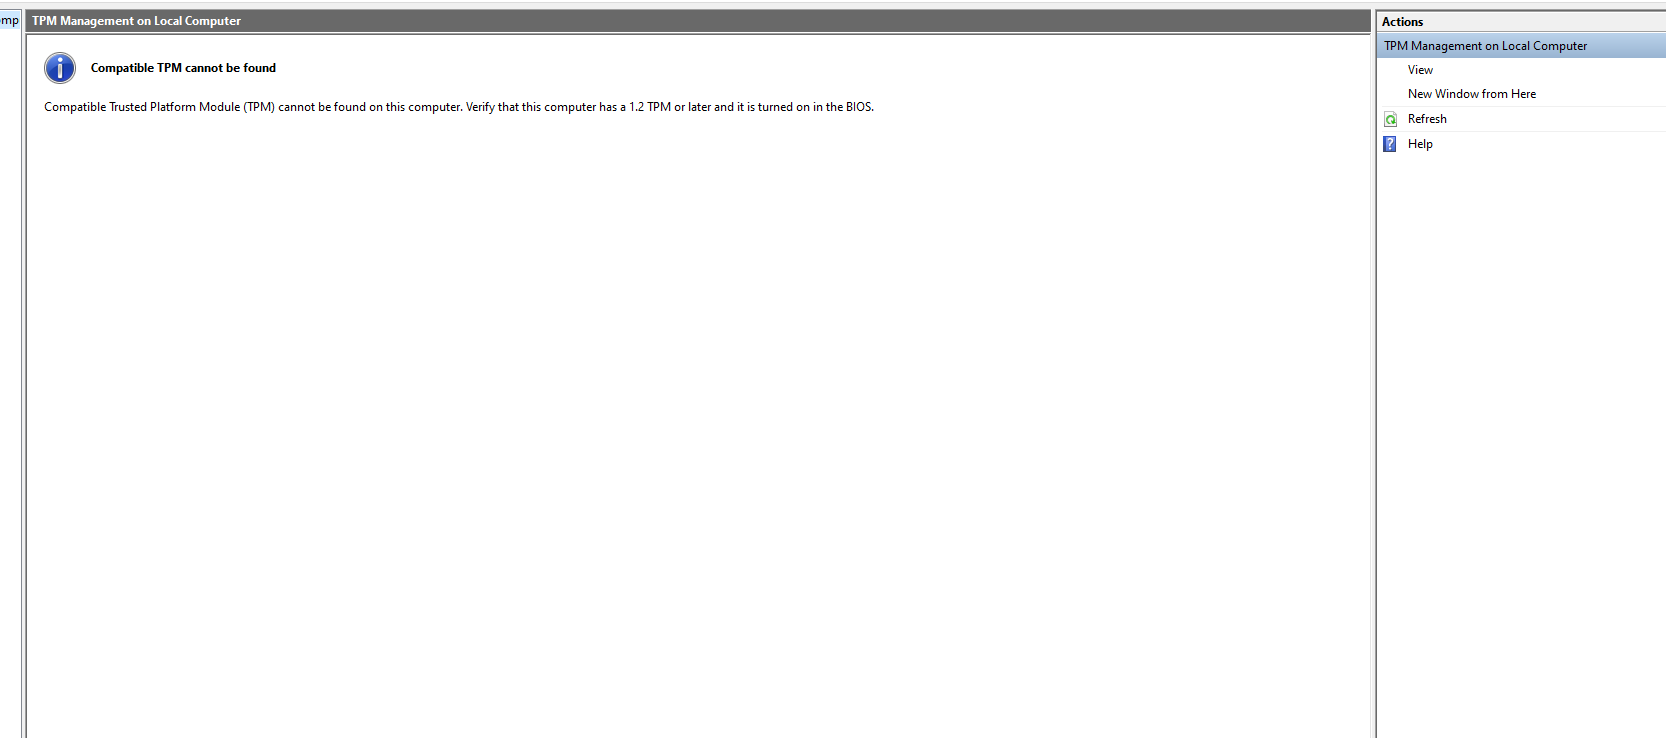
If either result is different, go back to the BIOS settings and check steps 5 and 6.
9. Do not install games before the spoofer
Do not install any games until everything is finished. When all steps are done, contact support and ask for the next step.
10. If you get a missing DLL error
If you see a missing DLL error while the spoofer runs, install the missing runtime libraries from Microsoft's official pages (for example the Visual C++ Redistributable packages). Do not download executables from ad-filled third-party file sites.
Common mistakes
- Formatting: you need to delete the partitions.
- Being online during installation.
- Turning off only one thing in the BIOS: both TPM and Secure Boot must be off.
- Skipping the final checks.
- Installing games before everything is done.
If you are stuck on any step in this guide, write to support with the step number and what you see on screen.
Stuck on a step?
Do not guess. Write to support with the step number and what you see on screen.
Contact support